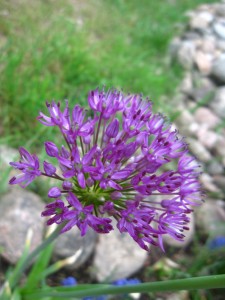
An Allium Experiment
This week my alliums (which have been finished for some time now) went to seed. I noticed the little green seed pods forming several weeks ago and was waiting (a little impatiently I must admit) for them to finish up.
Usually, I buy my alliums as bulbs or plants that are all ready to go into the ground. This year, I’m going to try planting the seeds.
Step 1: Get Seeds
I have alliums in the garden already so this was easy for me. If you don’t have plants, ask around to your friends, family, and coworkers. Your other option is to buy some.
Step 2: Harvesting
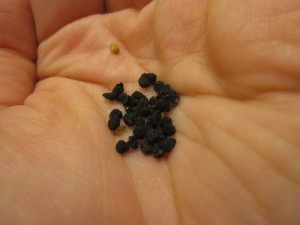
Right now is the perfect time to harvest (for gardeners in BC, it may be too late). Black seeds remain stuck inside the pods, for the most part. Harvesting is easy: shake the seed heads into a bucket or lob off the seed heads completely.
Step 3: Storing
You may not be planting these for a while so storing them is important or else you’ll end up with mouldy seeds. Remove any husk and do your best to remove any seeds that are speckled in white (mould). Seeds should be black.
Spread out the seeds onto a paper towel and leave in a cool, dry place for about a week. This will allow any moisture on the surface of the seed to evaporate off. Less moisture, less mould. Place seeds into an air tight container (a small mason jar works perfectly) and put container away from sunlight (ideally in the fridge).
Step 4: Decide
There are several ways you can plant the seeds.
1. Store and wait until spring. Keep seeds in the fridge over the next several months, waiting until March to start them. The plants will grow best in pots until they are a decent size and then they can be planted out. This may take more than one growing season depending on the type of allium you’re growing.
2. Plant directly into the soil now. Without your assistance, the seeds would have fallen to the ground now anyway. If you choose this route, keep the area well watered. You may or may not see germination this year. The seed is putting all of its energy into forming a bulb that will survive over the winter.
3. Plant now in pots. If you start your seeds in pots, you will likely have to bring them indoors for the winter. Pots cool down very quickly when the temperatures start to drop, whereas the soil in the ground takes a bit longer. The bulbs in the ground are also benefiting from the insulating snow cover. Best to bring your pots indoors once temperatures fall below zero. Water infrequently once the snow starts to fall and stay on the ground (once every 3 or 4 weeks depending on how dry your house is). Plant out in spring after germination and when threat of frost has passed.
I think I will try all three methods. I’ll be sure to report back.

