Sprouting Fun and Flavour
I have recently discovered a new world. No, it’s not any of the ones NASA recently discovered: it is the world of sprouts and you don’t need a spacesuit to partake.
What are Sprouts?
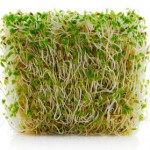
Simply put, “sprouts” is the all-encompassing term used to describe recently germinated seeds. For the purposes of this article though, “sprouts” will refer to the delicious, edible, fun-to-grow recently germinated seeds that are becoming more and more popular in households and sandwich shops.
What to Grow
Of course any seed will germinate and produce a tiny sprout but which should you be growing to eat? If you’re a beginner sprouter, I’d recommend any of the following (in alphabetical order, not my preference):
Alfalfa
Broccoli
Chia
Lentil
Mung Bean
Wheatgrass
Of course, there are so many more to choose from, as this supplier to Canadian folks will show you.
The Health Benefits
The jury is still out on just how much healthier sprouts are for you than the seeds themselves. Some say that the sprouting action releases vitamins and enzymes touted as an antioxidant, immune-boosting superfood. Others question where these added vitamins are coming since they can’t appear out of nowhere.
Either way, it’s hard to dispute the nutritional facts that do exist.
How to Sprout
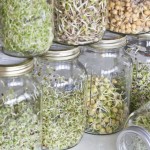
There are two main sprouting methods: soil and soilless. Soilless is, in my opinion, the easier and cleaner way to go about it, especially if you’re getting the kids involved. If you’re stuck inside for this activity (as most of us Canadians will be for another few months), the ability to grow anything without the potential for soil to be strewn about is always a plus. Let me walk you through this method.
You will need:
– Large mason jar
– Some sort of mesh or breathable covering for the top
– A rubber band or the threaded band that fits the jar
Steps
1. Add about half a cup of seeds to the jar.
2. Add water to the jar, filling it about 2.5cm above the seeds.
3. Let seeds rest overnight (keep them out of direct sunlight).
4. With the lid and mesh/breathable cloth secured in place, drain water after they have had a chance to soak.
5. Place your jar back in its cool spot (keeping it out of the sun).
6. Rinse your seeds twice a day (when you get up and when you go to bed works well).
7. Your seeds are ready to eat at any time. I find the younger they are, the more flavour they have, but maybe that’s all in my head.

Germination will depend on the type of seed you are sprouting. Some will show signs of activity in as little as three days, others will be slower.
Seeds and Safety
There has been some negative attention in the media regarding the safety of sprouts. E. coli and Salmonella have been a problem but it’s important to understand the difference between seeds and sprouting seeds.
Sprouting seeds are sanitized prior to sale to ensure any harmful bacteria have been killed off. Regular seeds don’t need this sort of special attention and you never know what you’re going to get. Make sure seeds you buy for sprouting are meant for sprouting.
Rinse the seeds well with water before eating them and inspect the seeds well before consumption: if the sprouts are any colour besides white or cream, discard; if you notice mould or anything else strange, it’s in your best interest to start again after cleaning the container very well.
Keeping your sprouts away from direct sunlight and hot temperatures will decreases problems.
Finally…
This is a great activity to do with the kids. Whether you are a parent or a teacher, the quick germination makes for an entertaining and educational experience. The fact that you can eat the experiment only makes it better.
Next week: microgreens. You don’t want to miss it!


